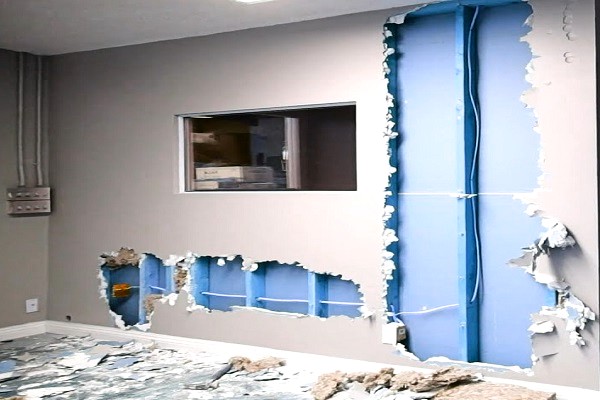
Removing walls during a renovation is a common part of the process. Wall removal opens up spaces and offers a wider range of flexibility and setup. While the prospect of tearing down walls sounds like an exciting task, in terms of safety, there’s actually quite a bit to keep in mind before starting.
Here’s some helpful information to consider before you begin your renovation project:
Removing Walls
Load-Bearing Walls
Non-Load-Bearing Walls.
A non-load-bearing wall doesn’t support any structural weight from a building or house. These walls are built lighter and are often called “curtain walls”, as they’re built to separate rooms. You may also find non-load-bearing walls in closets, basement walls, and walls between bedrooms. They can be easily removed without putting you or the structure in danger. While they can be connected to a ceiling, they aren’t built to support it.
Plan & Prepare
Always go into a renovation project with a plan and careful preparation. Have a timeline ready and a floor plan mapped out. These types of projects require time and patience, so it’s important to ensure you don’t rush it. Keep in mind that when you’re finished, your floors and ceilings may need some maintenance. When you have all of the details figured out, you won’t be unprepared halfway through the job.
To-Do List
Equipment & Tools
Ensuring you have the proper tools and equipment necessary for wall removal is crucial. You’ll want to have the following:
- Safety gear: Thick gloves, safety boots, safety hearing and breathing protection, long-sleeved shirt and pants, construction hat
- Hammer
- Utility knife
- Pry bar
- Cordless drill
- Circular saw
- Reciprocating saw
- Six-foot step ladder
- Voltage tester
Obtain Necessary Permits
While the idea of removing a wall seems simple enough, you can’t just proceed with the action. Any project that changes the existing support system of your home or business will require a permit. Permits are essential to apply for so that municipal authorities can determine whether your structure will be able to support the change you’re planning to make, helping to avoid any accidents.
Turn Off Water & Power
Interior walls are a complex setup. Mistakenly removing a wall that conceals wires, plumbing, or ventilation can cause a whole other set of issues. Use a saw to carefully cut out any drywall to determine if there is piping or wiring behind it. Make sure you know what you’re getting yourself into before removing an interior wall. Always remember to turn off any electricity and shut the water off.
Clear Wires or Pipes From the Walls
Interior walls can house electrical cables, sewer waste pipes, plumbing, communication cables, and much more. If there are several utility cables or plumbing pipes behind the wall, you may need to consult with a plumber or electrician. A professional can handle the situation by capping off or stubbing out any wires that you don’t need. A surface-flush electrical box might need to be installed to conceal old wiring.
Remove Obstacles
Ensure that anything in the path of the renovation zone is moved or covered up. You don’t want any unnecessary obstacles being in the way of your project or getting dirty during the process. Anything on a wall surface, from light switches to faceplates, should be safely removed. If you have to remove drywall, it can be a complex process.
Remove Drywall
Use the claw end of your hammer to break through drywall and fold it back to break away small pieces. You can also use your hands to pull any dangling portions of the drywall. Once you’ve located any drywall screws, take them out to make the removal complete.
Cut Away Studs & Protruding Nails
When coming into contact with studs, you’ll want to use a sledgehammer and hammer the top or bottom of the studs parallel with the plate, then twist the stud until it comes loose. In some cases, you may be able to use the studs again somewhere else. If you don’t need the studs, you can cut them at the center with a reciprocating saw and remove them by hand.
If nails are protruding from the floor or ceiling, use the reciprocating saw to cut away at the nails and remove them.
Repair Ceiling & Floor
Once the wall is removed, you’ll have to deal with the ceiling and floor to ensure you create a cohesive-looking appearance.
For patching the ceiling, use drywall tape and compound, repeating the process until you’re satisfied with the patching job. Use drywall sealer/primer to finish it. You can also hire a professional painter to cover up the patches with ease.
Flooring can be a harder fix. If you have carpet or linoleum flooring, you can use any extra materials you have left on hand to fill in the gap. Hardwood floors can be harder to patch or fix because finding wood that perfectly matches is difficult. Hiring a professional is a great way to take care of any holes or gaps in your flooring.
Conclusion
While the job can certainly be done on your own, it’s definitely beneficial to go with a professional instead. You don’t want to be demolishing walls in your kitchen alone and damaging things more than you mean to be. Calling a professional contractor today to help with your renovation plan will ensure that your project goes safely and smoothly.


